

Joined handwriting - FAQs

- Your child's letters are of a consistent and appropriate size, positioned correctly.
- Their handwriting is legible (so others can read it easily).
- They can produce, and maintain, a good speed.
- They have a fluid hand movement that is comfortable.
- Once your child has learnt to form the lower-case letters correctly, they are ready to join their writing.
- Size is not important; consistency of size is.
- All lower-case letters need to be placed correctly on the line and spaced appropriately next to each other.
- Joining can start before all the capital letters have been taught, as UK capital letters never join.
- There are seven join group strokes to be taught in order:
- Teaching the different join types in specific groups helps a child to understand the directional pushes and pulls required to successfully join the different letter combinations.
- Begin by joining 2 or 3 letters together at a time rather than long lines of joins that go across the page. It is best to match the number of letters joining to a sensible word length.
- Remind your child that the aim is not to take their pencil off the paper until the number of letters or word has been completed, then they dot the i’s and j’s and cross the t’s and x's.
Most children will find the bottom joins the easiest to achieve, as it only requires the extension of the exit stroke they already put on the letters. So, teaching these first helps to build your child’s confidence in their ability before moving on to more tricky join groups.
The joins that tend to cause the most confusion and difficulty are the letter “e” joiners (Groups 4 and 5) and top exit letter joins (Groups 6 and 7).
- There are four join groups to be taught in order:
- Teaching the different join types in specific groups helps a child to understand the directional pushes and pulls required to successfully join the different letter combinations.
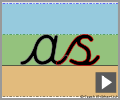
- For bottom joining (Group 1) letters all your child has to do is write the letters closer together without lifting their pencil off the paper.
- Begin by joining 2 or 3 letters together at a time rather than long lines of joins that go across the page. It is best to match the number of letters joining to a sensible word length.
- Remind your child that the aim is not to take their pencil off the paper until the number of letters or word has been completed, then they dot the i’s and j’s and cross the t’s and x's.
Only the top exit letters to the letter “e” (Group 2) and top exit letter joins (Groups 3 and 4) need to be taught.
In the UK, capital letters never join lower-case letters.
- They may not be forming the single letters correctly.
- Some children will find the join strokes a little tricky to start with, so try using the joins section in pre-handwriting patterns to help them learn the additional pencil strokes needed.
- Some children may not remember which join strokes to use. So teach the joins in groups, and build up their confidence by starting with the easiest joins.
- Begin by joining 2 or 3 letters together at a time rather than long lines of joins that go across the page. It is best to match the number of letters joining to a sensible word length.
- Remind your child that the aim is not to take their pencil off the paper until the number of letters or word has been completed, then they dot the i’s and j’s and cross the t’s and x's.