

The three handwriting stages
Stage 1 - Pre-handwriting patterns
Learning pre-handwriting patterns is the important first step in handwriting.
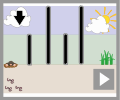
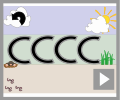
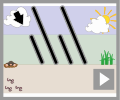
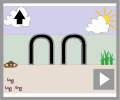
Pre-handwriting patterns help a child to learn the shapes and directional pushes and pulls of the writing tools required to form letters. All letters are a combination of these shapes and lines.
Young children’s first experience on the handwriting route involves mark making and simple drawings, whether it is with finger paints, writing in sand or with pencils and crayons. From about the age of 2, children start to move from a simple grasping (primitive) grip to one that secures the writing tool between the fingers and the thumb. In the early stages of writing young children will try different holds, which is part of their normal grip development for handwriting and drawing.
It has been widely acknowledged that a child who is forced to hold a writing tool using the correct grip, before they are developmentally ready, can be turned off engaging in the writing/drawing process as well as developing a poor pencil grip later on. Remember some children do not develop the ability to use the tripod grip until the age of 5/6 years old.
As young children’s body’s (gross motor skills), hand strength and dexterity (fine motor skills) are developing they need a range of pencil, crayon and paint brush thickness’. Young children tend to prefer the thicker drawing tools as they can grip them more easily, helping them to mark make. If the pencil is too thin they find it difficult to grasp and control, making the drawing experience unsuccessful, which can lead to frustration and discourage them from trying again.
Vertical drawing and painting surfaces are important in helping young children to develop the wrist strength and flexibility they will need later on to hold a pencil correctly for handwriting. Using plain rather than lined paper is considered best as many children find it less restrictive. Young children due to the stage of their physical development use large movements to draw (from the shoulder rather than the wrist) which often creates larger shapes and lines. As their gross and fine motor skills develop so does their pencil grip and ability to draw and write at a small scale, moving more from the elbow and wrist.
Young children learn many of these directional pushes, pulls and changes in direction on a much larger scale, long before they pick up a pencil, through playing with cars or pretending to cook. These movements become the drawings/scribbles which young children form once they start mark-making, initially as big uncontrolled movements then becoming more controlled and smaller as their gross and fine motor skills develop.
These handwriting patterns are initially taught through activities such as drawing pictures and patterns in sand, paint and with other writing tools and materials. These activities are introduced based on large scale movements to help store them in the motor memory to be recalled later when the child is learning to refine their line and shape drawing skills. Then through more focused formal approaches such as worksheet activities as they help a child to experience how writing tools feel when drawing different types of line and shapes, which they may not otherwise use.
Once the pre-handwriting patterns have been mastered a child will have the skill base necessary, and be more confident, to form letters, numbers, symbols and later on the join strokes required for a joined fluid and speedy handwriting style.
Stage 2 - Single letter and number formation
Initially learning to form letters is a less formal affair, using a range of media and game type activities e.g. drawing letters with paints or in sand. The important thing is to model and explain how to make the letter shapes with the correct start point, directional flow of the tool, or hand, and finish point.
Letters are created through joining lines and curve shapes in a particular way. They have a designated start point and set directional pushes and pulls of the pencil to reach the designated finish point. This is why we teach letter formation in groups/families rather than in alphabetical order. Certain groups use the same, or similar, shape and directional pushes and pulls of the pencil to form the letter, for instance the letter c has the same start point and anti-clockwise directional movement shape that is needed to create the letters a, d, g, o and, though a little more complicated, the letters s and e. Teaching letters in groups and families can also help to limit letter reversals such as b and d.
To begin with learning to write letters or numbers is about learning to move a pencil in the correct directional sequence of movements; size is not important at this stage, big is beautiful (Beginners animations and worksheets). Once the letters can be formed, a child can then focus on the size and position of the letters in relation to each other (Refiners). The size and accuracy of the letter shapes decrease and improves as a child’s gross and fine motor skills (Key Strengths) develop.
Once a child is ready to start a more focused formal approach to learning how to form single letters or numbers it is important to also introduce the other Key Ability skills required for handwriting:
- sitting correctly at a desk - it is important to ensure that their sitting position and table height are correct for them.
- pencil grip - that it is appropriate for the child’s developmental stage and age.
- paper position - for younger children this may still be on a vertical surface allowing them to make big movements in-line with their pencil grip stage.
Usually at this stage a child will have a definite hand preference, being left or right handed (hand dominance). At the beginning of foundation stage (age 4 years) not showing a preferred hand dominance is not an issue, however as they come to the end of foundation stage (age 5 years) it can make life a little more difficult for them. Again by this stage if a child is swapping hands through a handwriting task they may need a little help in developing their hand dominance.
It is important to learn how to form letters correctly to begin with as this makes the transition from single letter formation to joined letter handwriting much easier.
Once a child has mastered and is able to form lower-case letters of a consistent size, and have them correctly positioned in relation to one another, they are ready to learn how to join their writing.
Stage 3 - Joining letters

Handwriting styles which allow all the lower-case letters to join are best for children as they make their handwriting fluent and quick, by reducing the strain on their hand, wrist and fingers. Children generally begin to join letters from the age of 6 to 7 years old, if taught a cursive letter font style. Those taught a continuous cursive font style to begin with tend to join much earlier due to the nature of this font from the age of 4½ to 6 years old.

As a child’s fine motor skills develop it enables them to form smaller more refined versions of the letters and it is more appropriate to use lined paper.
A child is ready to join letters when:
- They have learnt to form all the lower-case letters correctly.
- Letters are of a consistent and suitable size (for younger children these may be large in size but consistent).
- Letters are positioned appropriately on the writing line as well as in relation to one another.
Using a systematic approach to teaching letter joins, whether a child has learnt cursive or continuous cursive single letter fonts, is important. Teaching the different join types in specific groups helps a child to understand the directional pushes and pulls required to successfully join the different letter combinations.
Moving from Cursive Single Letters to Joining
There are seven join strokes to be taught. Most children will find the bottom joins the easiest to achieve, as it only requires the extension of the exit stroke they already put on the letters. So teaching these first helps to build a child’s confidence in their ability before moving on to more tricky join groups. The bottom to “c” shape joins can be tricky at first but soon mastered. The joins that tend to cause the most confusion and difficulty are the letter “e” joiners and top exit letter joins.
Moving from Continuous Cursive Single Letters to Joining
There are three join strokes to be taught. The easiest is the bottom exit letters (the majority of the letters), as all a child has to do is write the letters closer together without lifting their pencil off the paper. So teaching this first helps to build a child’s confidence in their ability before moving on to more tricky join groups. Only the top exit letters to the letter “e” and top exit letter joins need to be taught for continuous cursive, as the nature of the font style means that the lead-in and exit strokes needed to join the majority of letter combinations have already been taught.
The ultimate aim is for a child to develop a good handwriting style, which means;
- They can produce and maintain a good speed.
- Have a fluid hand movement that is comfortable.
- Letters are of a consistent and appropriate size, positioned correctly.
- Handwriting is legible (so others can read it easily).